Administration Tool
User Management
KioWare Server gives you the ability to create users that may have full or limited access. The access that is given is very configurable. Each user can be limited as to what they can access and/or change.

From the first drop down list you can either edit an existing user or create a new one.
Create New User
In this case, we're creating a new user.
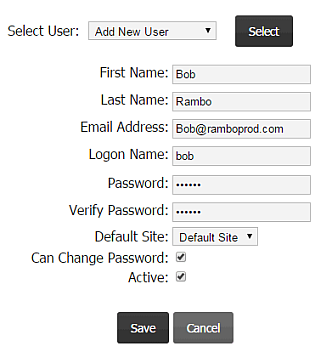
- First Name: Name shown in list.
- Last Name: Name shown in list.
- Email Address: Optional email.
- Logon Name: Username the user will log in with. Note: If the Use Email Address For User Name setting on the System Configuration screen is checked, then the Logon Name will not display unless the user who is logged in has been assigned the Server Administrator role or is editing a user account whose existing Email Address and Logon Name are different.
- Password: Password the user will log in with.
- Verify Password: Password again!
- Default Site: Site the user belongs to.
- Can Change Password: Determines if users can change their own passwords to log onto KioWare Server. When unchecked, the Change Password option is hidden in the left menu (see Navigation Map for KioWare Server) for the user.
- Note: Only administrative users will be able to change this setting. This setting cannot be changed for a user when that user is currently logged on.
- Active: Whether logon is enabled or not.
User Settings Tab
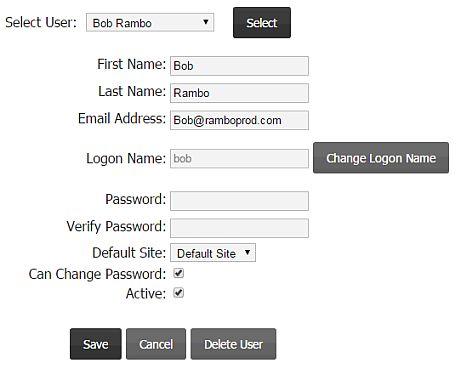
This tab appears after creating a new user or when selecting an existing user to edit or delete.
Edit User
The settings are the same as those for creating a user (see New User above). Edit as needed and click the Save button to save.
Note: Only administrative users can access this tab. General users can only change their own passwords (via the Change Password option in the left menu), if the Can Change Password checkbox is checked for their user accounts, and cannot change their own checkbox settings. (See New User, Can Change Password above.)
Edit Username
The username initially is read only. Click the Change Username button and the username becomes editable. Edit as needed and click the Save button to save.
Delete User
Click the Delete User button to remove a user. A popup window appears asking for confirmation of the delete. Click OK to delete the user and all related settings and data.
Note: Deleting permanently removes a user from the KioWare Server database and cannot be undone.
Memberships Tab
On this tab, you give access to parts or all of the server console. The layout is alot like the file picker.
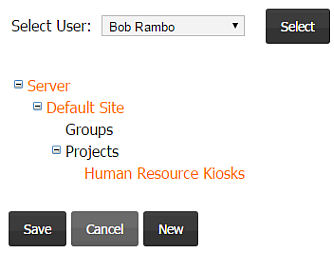
- Save: The most important button here. Unless you click Save when you're done, nothing will stick.
- Cancel: Goes back to the User Management page without saving changes.
- New: Enables you to select a new part of the server console to give the user permission to.
- Tree view list: List of every part of the console that the user has access to.
Some of the items in the tree view are links. These items do not inherit permissions from their parent. When you click one, such as the Server link you will be given the ability to edit permissions for the Server part of the console for the current user.
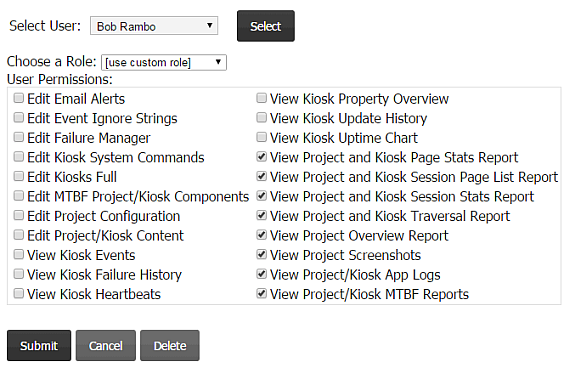
- Choose a Role: In this dropdown list, you can select either a role for the user, or assign permissions manually by clicking the checkboxes.
- Submit: Temporarily saves changes in memory. You must click Save on the memberships tab to permanently save changes.
- Cancel: Does not store changes in memory and returns to the memberships tab.
If you make the current user a Server Administrator from the Server item, they will have full access to the console no matter what permissions are specified below because permissions are inherited.
To give access to a different part of the console, add new access by clicking the New button.
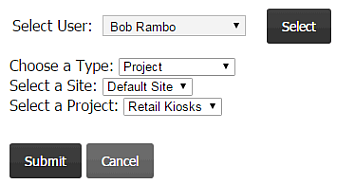
- Choose a Type: Select a different part of the console to give access to (Project, Site, or Group).
- Select a ?: Depending upon what is selected as a Type, the ? can be different.
- Select a ?: This second option will be created if Project or Group is chosen as the Type because Projects and Groups are always contained in a Site.
- Submit: Temporarily stores the changes in memory.
- Cancel: Does not store changes.
Notifications Tab
This tab displays all notifications set up at the Site, Group, and Project levels. The Item Name column indicates the Site, Group, and Project names. Data in all other columns are based on the specific notification settings (see Site Management Tab, Edit Site Notifications, Group Management Tab, Edit Group Notifications, and Project Management Tab, Edit Project Notifications).
Note: Notifications are not available at the kiosk level and will never appear on this tab.

Role Management
Role management is very powerful and easier to work with than setting permissions manually. The best way to use roles is to assign a role to the top level item that the user has access to because permissions are inherited. For instance, if the user needs access to Site1 but not Site2, assign a role to Site1. Roles are beneficial in that they can be reused for as many users as you want.
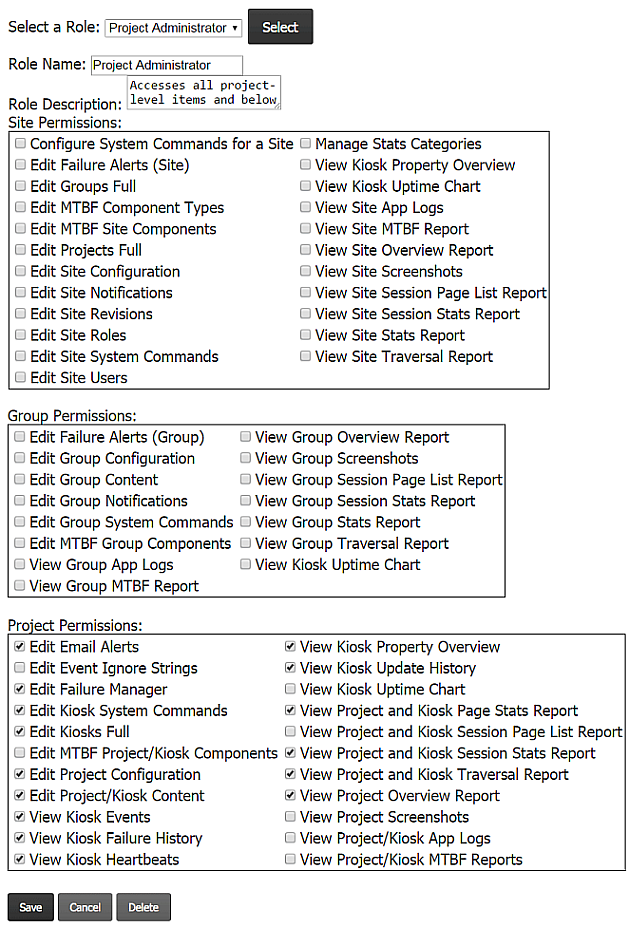
- Role Name: Name of role.
- Role Description: Optional description of role.
- Permissions checkboxes: Permissions that the role will give to users.
- Save: Creates the new role.
- Cancel: Discards the new role without saving.