Configuration Tool
Substitution Variables
The string constants defined below may be included in any URL that is added in the Configuration Tool. This can be a URL used by KioWare to load a page (Start Page, toolbar button, etc.) or the URL of the settings file (for loading settings).
| $$KIO_SITENAME$$ | KioWare Server Site Name (for related XML tag, see Installation, Installation Instructions, Provisioning, KioWare Tags, serverConfig) |
| $$KIO_KIOSKNAME$$ | KioWare Server kiosk Name (for related XML tag, see Installation, Installation Instructions, Provisioning, KioWare Tags, serverConfig) |
| $$KIO_UNITNAME$$ | KioWare Server unit Name (for related XML tag, see Installation, Installation Instructions, Provisioning, KioWare Tags, serverConfig) |
| $$KIO_DEVICEID$$ | Device ID from the About screen (see Configuration Toolbar, About KioWare below) |
| $$KIO_SERIALNUM$$ | Device Serial Number from the About screen (see Configuration Toolbar, About KioWare below) |
| $$KIO_UPDATEROOT$$ | “file://” path to the root of the content update directory |
| $$KIO_STORAGEDIR$$ | KioWare for Android storage directory |
| $$KIO_EXTSTORAGE$$ | Device external storage directory (usually /sdcard) |
| $$KIO_USERDATA$$ | KioWare user data directory (/storage/emulated/0/Android/data/com.adsi.kioware.client.mobile.app/UserData) |
Configuration Toolbar
The configuration toolbar appears at the top right of the screen. Click the three dots to show the dropdown menu.

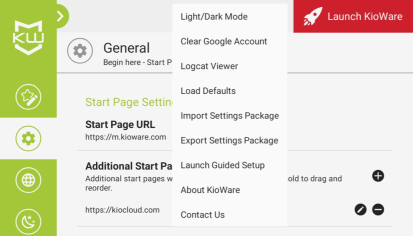
- Launch KioWare - Opens the KioWare for Android browser.
- Dropdown Menu (labeled as three dots) - Contains additional toolbar options. (On smaller tablets, one or more of the above-listed options may also appear in this menu; see image above.)
- Light/Dark Mode - Sets if light mode (light background with black text), dark mode (dark background with white text), or the system default will be used as the theme for the Config Tool.
- Clear Google Account - (Only available when a Google Drive login is set up) With multiple Google accounts available, if you have specified one to use when logging onto Google Drive (as when importing/exporting settings; see Import/Export of Settings, Images, and Other Resources below and General Tab, Remote Settings), selecting this option will clear that account information and prompt you to specify an account the next time you try to log on.
- Logcat Viewer - Provides access to Logcat Viewer for viewing Event Logs. (For additional Logcat Viewer settings, see User Interface Tab, Development Buttons, Hide/Show Logcat Viewer Button and Security Tab, Exit Passcodes, Edit Additional Passcode, Exit Action, Open Logcat Viewer.)
Note: Some Android devices have a physical “Options” or “Settings” button included in their hardware. When this button is available, it displays the menu containing the “Logcat Viewer” and “About KioWare” options (and the button labeled as three dots is hidden).
- Watch Now!
- Our “how-to” video KioWare for Android: Sending Log Files shows how to open the Logcat Viewer to access Event Logs and how to send Event Logs to KioWare Support both during normal operation and when KioWare for Android is having issues while booting.
- Load Defaults - WARNING: Resets settings to defaults. If any resources were embedded into KioWare for Android (see Import/Export of Settings, Images, and Other Resources, Embedding Resources below), you will be asked if you want to delete or keep them.
- Import Settings Package - Loads settings and any embedded resources from a specific location (see Import/Export of Settings, Images, and Other Resources below).
- Export Settings Package - Saves settings and any embedded resources to a settings file for backup and importing to other installations (see Import/Export of Settings, Images, and Other Resources below).
- Launch Guided Setup - Select this option to open the Guided Setup (see image below), which can help you easily set up the Config Tool in the way that is best for how you want to use your device (to create any type of interactive web setup, set up a digital sign, or run a single Android application overtop of KioWare).
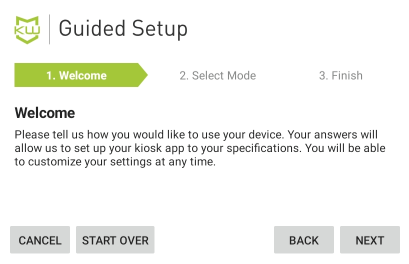
The table below describes how you can use the Guided Setup to achieve your purpose and also provides helpful hints for using it. Note: The Guided Setup only contains commonly used settings, and these and any other settings can be changed at any time in the Config Tool, except for portal settings (which can only be changed in the Guided Setup).
| USING THE GUIDED SETUP |
| I Want KioWare to... | Which Option (Mode) to Select | Things You Can Set Up in This Mode |
| Display web-based content that users will be interacting with | As interactive web content |
- Set if the interactive app is a landing page, video player, KioCall video chat software, or your own custom application (app)
- Based on the interactive app you select, set up a custom page (with your desired fonts, colors, and text) for accessing a portal, videos, or KioCall
- For a portal or KioCall, set up custom buttons for opening web URLs/apps/KioCall (portal) or for quick calling of specific users/kiosks/groups (KioCall)
- For a portal, videos, or KioCall, set up custom categories that can be assigned to custom buttons or nested
- For a portal or KioCall, set the button layout (number of rows and columns buttons are to show in)
- For custom apps, set the start page URL, set up block/allow lists for website domains and pages, and set how popups are to be handled
- Set amount of time a user session can be inactive before it ends and a new user session starts
- When there is no user activity, set if custom images/videos should loop or if a custom list of web pages should show sequentially
- For a portal or custom app, set up a toolbar containing your choice of buttons and (for portals only) an address bar
|
| Display one or more digital signs | As non-interactive digital signage |
- Set if custom images/videos should loop or if a custom list of web pages should show sequentially
- Set the amount of time for each image/video or web page to display
|
| Run behind the scenes while a single Android application displays on top | To secure a single Android application |
- Set app that will run overtop of KioWare
- Turn on the Accessibility Service (allows KioWare to detect activity/inactivity in the third-party apps)
- Turn on Usage Data Access (allows KioWare to detect recently used app and the state of the topmost app)
- Set amount of time a user session can be inactive before it ends and a new user session starts
- When there is no user activity, set if custom images/videos should loop or if a custom list of web pages should show sequentially
|
| Run behind the scenes while multiple Android applications display on top | To secure multiple Android applications |
- Set up a custom page (with your desired fonts, colors, and text)
- Set up custom buttons for opening apps
- Set up custom categories that can be assigned to custom buttons or nested
- Set the button layout (number of rows and columns buttons are to show in)
- Turn on the Accessibility Service (allows KioWare to detect activity/inactivity in the third-party apps)
- Turn on Usage Data Access (allows KioWare to detect recently used app and the state of the topmost app)
- Set amount of time a user session can be inactive before it ends and a new user session starts
- When there is no user activity, set if custom images/videos should loop or if a custom list of web pages should show sequentially
- Set up a toolbar containing your choice of buttons
|
|
| GUIDED SETUP HELPFUL HINTS |
| Item | Mode | Important Things to Know About This Item |
| Categories | | |
Add Options to “Category” Dropdown | Interactive web content (for portals, videos, and KioCall), Multiple App mode |
This dropdown is initially blank. You can add options to it using these steps:
- On the Add Buttons screen, select Add a New Button, choose Category from the Button Type dropdown, and enter identifying label text in the Label Text setting.
- Repeat the above step for as many categories that you want to add. Then, when adding any type of button or editing any existing button, these options will be available in the Category dropdown for assigning to the button.
|
Create Nested Categories | Interactive web content (for portals, videos, and KioCall), Multiple App mode |
Once you add at least one category (see above), you can also add subcategories to it using these steps:
- Add one category using the steps above (parent category).
- Then repeat these steps to add a second category (category to be nested).
- On the Add Buttons screen, select the pencil icon of the second category (the Edit Button window opens).
- In the Category dropdown, select the parent category. This will nest the second category under the parent. Buttons can now be assigned the parent category, or they can be assigned the parent/subcategory combination (by assigning the second category).
|
| file:// Protocol | Interactive web content (for videos) |
You can use this protocol in file paths of local video files, as in these examples:
- file://storage/emulated/0/android/data.com.adsi.kioware.client.mobile.app/userdata/filename.mp4
- file://sdcard/android/data.com.adsi.kioware.client.mobile.app/userdata/filename.mp4
|
| Substitution Variables | Interactive web content (for videos) |
You can use substitution variables in file paths of local video files, as in this example:
- $$KIO_STORAGEDIR$$/UserData/filename.mp4
|
| “Try It” Button | | |
Warnings | All | After selecting the Try It button, the “This feature has been blocked.” popup will show if the accessibility service (see Attract/Inactivity Tab, Inactivity Timers, Inactivity/Activity Service) detects some app or service that is not allowed. This popup will only show for a few seconds before continuing with the preview (which actually runs KioWare using the settings you selected). |
Error Pages | All |
After selecting the Try It button, if the “Name Not Resolved” error page shows, it may indicate any of the following:
|
Return to Guided Setup | All | The Guided Setup should still be showing if you select the Try It button and then exit KioWare and return to the Config Tool. If Device Admin mode is enabled (see Security Tab, General Options, Enable Device Administrator) with an exit pattern set up in your device settings (see also Security Tab, General Options, Exit Pattern), KioWare will run on top of your tablet's lock screen, and you can (swipe up, if needed and) use your device's lock screen PIN, pattern, or password to exit KioWare. |
-
About KioWare - Displays the KioWare About screen, which contains the following:
- Device identification number
- Device type (manufacturer and model)
- Serial number
- KioWare version and revision number [See also the related JavaScript function: KioWareUtils, General Functions, getBuildDetails in the Scripting section of this user guide.]
- KioWare device support version and revision number (only available if the KioWare device support application is installed)
- KioWare Samsung support version and revision number (only available if the KioWare Samsung KNOX support application is installed; if not installed, the Samsung KNOX tab of the Config Tool will show a warning of KioWare Samsung Support Not Installed)
Note: Some Android devices have a physical “Options” or “Settings” button included in their hardware. When this button is available, it displays the menu containing the “Logcat Viewer” and “About KioWare” options (and the button labeled as three dots is hidden).
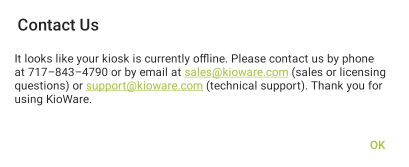
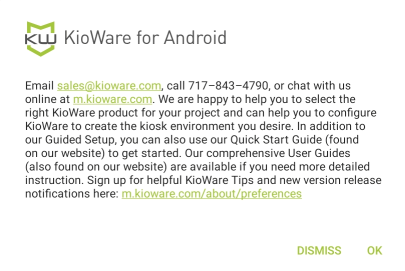
- Contact Us - When you select this button, KioWare first checks if the tablet has an Internet connection. If there is no Internet connection, a popup window shows to provide information for contacting KioWare by phone or email (see image below).
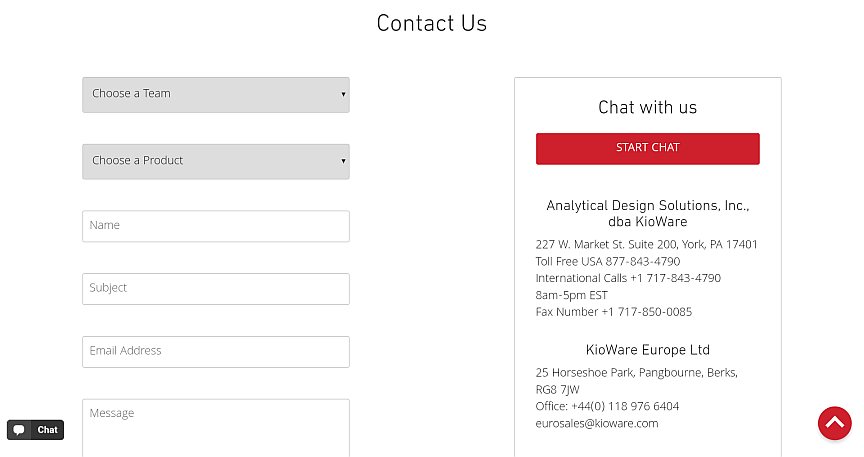
If an Internet connection is found, the Contact Us page of the KioWare website will show (see image below).
Configuration Tool Banner and Messages
When first installing KioWare for Android, the Config Tool will show a bottom banner (see image below). This banner is used to access important messages for KioWare for Android users. Use the “X” button to close the banner. Once closed, it will not show again until KioWare for Android is uninstalled and re-installed.

Selecting this banner will show a popup window (see image below) containing important messages about the model and version of KioWare that you are running, status of your licensing and support, easiest way to contact KioWare Technical Support, and other important things you may need to know about KioWare for Android. Certain messages will show at regular intervals (0, 2, 4, and 6 weeks), but only one message will show at a time.
Using Custom Images
KioWare for Android allows custom images to be used for the KioWare for Android action bar (see User Interface Tab, Enable Action Bar) and its buttons (see User Interface Tab, Standard Buttons), and also the camera buttons (see Devices Tab, Camera, Default Display Settings). Custom images can be inserted manually or automatically.
Manual Insertion
Images for the action bar (see User Interface Tab, Enable Action Bar) and its buttons (see User Interface Tab, Standard Buttons), and also camera buttons (see Devices Tab, Camera, Default Display Settings) can be overridden by putting PNG images in the following folders (you may have to create these folders if they do not already exist):
EXTERNAL_STORAGE_DIR/Android/data/com.adsi.kioware.client.mobile.app/Toolbar
EXTERNAL_STORAGE_DIR/Android/data/com.adsi.kioware.client.mobile.app/Camera
|
| EXTERNAL_STORAGE_DIR | The tablet root internal storage directory |
The tables below contain file naming guidelines for custom images, which must be portable network graphic (PNG) files. Filenames are case sensitive.
| FILENAMES OF ACTION BAR AND BUTTONS |
| Item | Single Image | Enabled Image | Disabled Image |
| Back | N/A | back_e.png | back_d.png |
| Forward | N/A | forward_e.png | forward_d.png |
| Home | home.png | N/A | N/A |
| Refresh | refresh.png | N/A | N/A |
| Log Off | logoff.png | N/A | N/A |
KioWare Logo
(action bar image) | logo.png | N/A | N/A |
KioWare Text
(action bar title text; not an image) | title.txt – if the file exists, the first line of the text file will be shown. | N/A | N/A |
| FILENAMES OF CAMERA BUTTONS |
| Button | Unpressed State (Up) | Depressed State (Down) |
| Capture | capture_up.png | capture_down.png |
| Exit | exit_up.png | exit_down.png |
| Switch | switch_up.png | switch_down.png |
| Timer | timer_up.png | timer_down.png |
| Accept | accept_up.png | accept_down.png |
| Cancel | cancel_up.png | cancel_down.png |
Automatic Insertion
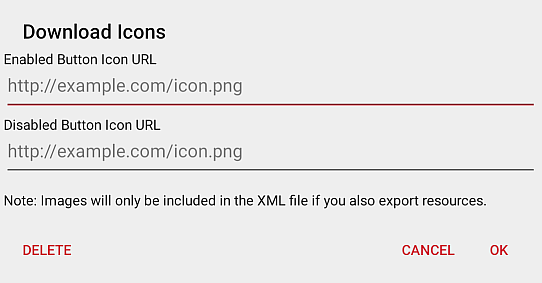
Images for the action bar (see User Interface Tab, Enable Action Bar) and its buttons (see User Interface Tab, Standard Buttons), and also camera buttons (see Devices Tab, Camera, Default Display Settings), can automatically be overridden. In the Configuration Tool, settings for these items include a pencil icon (see below).

Select the pencil icon and a popup window displays (see below) to enter the URL for a custom image (some popup windows include additional settings). With some buttons, more than one custom image can be used to indicate different button states (e.g., enabled or disabled).
Import/Export of Settings, Images, and Other Resources
Embedding Resources
Resources such as custom images (see Using Custom Images above) and addins can be embedded into your KioWare for Android settings. Embedded resources are available for export and import, which can be useful for quickly setting up new installs of KioWare for Android.
- KioWare for Android Addins - To embed addins, place them in the following folder on your tablet (you may have to create this folder if it does not already exist). When using the “Export Settings” button on the configuration toolbar (see Configuration Toolbar above), all files in this folder will automatically be exported into your settings file. When importing via the “Import Settings” button, any addins contained in your settings file will automatically be saved to this folder.
-
| EXTERNAL_STORAGE_DIR/Android/data/com.adsi.kioware.client.mobile.app/Addins |
| EXTERNAL_STORAGE_DIR | The tablet root internal storage directory |
- Custom Images (Manual Insertion) - Custom images (for camera and KioWare toolbar buttons) that were inserted manually (see Using Custom Images, Manual Insertion above) must be stored in one of the following folders (you may have to create these folders if they do not already exist). Images must also be named according to the file naming guidelines. Then, when using the “Export Settings” button on the configuration toolbar (see Configuration Toolbar above), all correctly named files in these folders will automatically be exported to your settings file. When importing via the “Import Settings” button, any camera/toolbar images contained in your settings file will automatically be saved to these folders.
-
EXTERNAL_STORAGE_DIR/Android/data/com.adsi.kioware.client.mobile.app/Camera
EXTERNAL_STORAGE_DIR/Android/data/com.adsi.kioware.client.mobile.app/Toolbar |
| EXTERNAL_STORAGE_DIR | The tablet root internal storage directory |
- Custom Images (Auto-Insertion) - Custom images (for camera and KioWare toolbar buttons) that were auto-inserted via the pencil icon in the Configuration Tool (see Using Custom Images, Automatic Insertion above) are automatically stored in the above folders, and their filenames are automatically named according to the file naming guidelines (see Using Custom Images, Manual Insertion above). When using the “Export Settings” button on the configuration toolbar (see Configuration Toolbar above), these files will automatically be embedded into your settings file. When importing via the “Import Settings” button, any camera/toolbar images contained in your settings file will automatically be saved to these folders.
- Other Resources - To embed any other resources (e.g., an HTML application and all of its related folders/files), place the folders/files in the following folder (you may have to create this folder if it does not already exist). When using the “Export Settings” button on the configuration toolbar (see Configuration Toolbar above), you will have the option of ignoring all files in this folder or exporting the files into your settings file (see Exporting below). When importing via the “Import Settings” button, any additional resources contained in your settings file will automatically be saved to this folder. This is useful when your “Start Page URL” (see General Tab, Start Page URL) is set to an HTML application, and you want to easily import settings and folders/files for the application all at once.
-
| EXTERNAL_STORAGE_DIR/Android/data/com.adsi.kioware.client.mobile.app/Embedded |
| EXTERNAL_STORAGE_DIR | The tablet root internal storage directory |
Importing
The “Import Settings” button on the configuration toolbar (see Configuration Toolbar above) will load settings and any embedded resources from a specific location. A popup window displays the following options:
- Google Drive - (Only available if Google Play Services is installed) Select a file from Google Drive.
- Local File - Select a file from the local drive of your tablet. Note: When maneuvering through folders, select the top folder icon (labeled with two dots) to move back one level.
- URL - Enter a local file path (accesses your tablet's internal/external storage) or remote file path (accessed from a server via a network connection). If a URL was entered in the “Settings File Location” option (see General Tab, Remote Settings, Settings File Location), this URL will appear by default but can be changed.
- KioWare Server - (Only available if access to KioWare Server is set up; see Kiosk Management Tab, KWS Journal Entries) Select a file from KioWare Server.
After specifying the location of the settings file to import, the content in the file will overwrite the prior settings in the Configuration Tool. For settings not included in the settings file, the existing settings will remain in the Configuration Tool.
Exporting
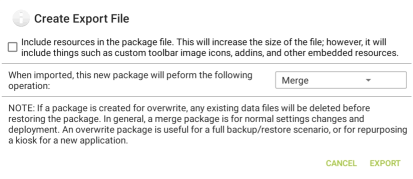
The “Export Settings” button on the configuration toolbar (see Configuration Toolbar above) saves settings and embedded resources to a settings file for backup and importing to other installations. A popup window appears, prompting you to tell KioWare for Android how to handle resources and importing of the saved package (see image below).
- If embedded resources (images, addins, etc.) are available for export (i.e., are stored in the Embedded folder; see Embedding Resources, Other Resources above), check the top checkbox. Note: Checking this checkbox will increase the size of your exported package file.
- In the dropdown, select if this file should overwrite all data in the Config Tool or merge with current data when imported, and then select the “Export” button.
A second popup window displays the following options:
- Google Drive - (Only available if Google Play Services is installed) Select a file from Google Drive or create a new file anywhere on it.
- Local File - Select a file from the local drive of your tablet or create a new file anywhere on it. Note: When maneuvering through folders, select the top folder icon (labeled with two dots) to move back one level.
- KioWare Server - (Only available if access to KioWare Server is set up; see Kiosk Management Tab, KWS Journal Entries) Select a file from KioWare Server.
By default, the settings file is saved to the following folder:
| EXTERNAL_STORAGE_DIR/Android/data/com.adsi.kioware.client.mobile.app/kwsettings.xml |
| EXTERNAL_STORAGE_DIR | The tablet root internal storage directory |
When using this default directory, the settings file and all related settings/resources will be deleted on uninstall and reinstall. To avoid this deletion, you can create a .kiowaredata folder in the tablet's root internal storage directory (will only display when the tablet is set up to show hidden files and must begin with “.”). Once created, KioWare for Android will write the settings file to this directory whenever settings are exported. The directory will not be deleted on uninstalling and reinstalling.
Note: Different from KioWare for Windows, the unique value at the top of the settings file is used to indicate from which device the file was saved and should not be changed. The value is there so that KioWare for Android can avoid overwriting other installations non-shared settings such as the “Kiosk Name” and “Unit Name” on the Kiosk Management tab.
Automatic Importing with KioWare Server Managed Config Settings
KioWare Server managed configuration settings can be used as the settings file during auto-import. The steps below describe how to set this up within KioWare Server and the KioWare for Android Config Tool.
Setting Up the KioWare for Android Config Tool
- Be sure your device is connected to the Internet.
- On the Kiosk Management tab, select “Server Connection Settings” followed by “KW Server URL”. Enter the URL for the instance of KioWare Server that you are using and select “OK”. This URL will show on the prior screen.
- Note the “Kiosk Name” and “Unit Name” on this screen for later entry into KioWare Server.
- On the General Tab, scroll down and turn on “Enable Automatic Settings Import”. Then select “Settings Location” followed by “KioWare Server”.
- A popup window may indicate successful communication with KioWare Server. Select “OK”, and the KioWare Server URL will show on this tab.
Setting Up KioWare Server
- Log onto KioWare Server.
- Under the Kiosks section, select the “ADD/REMOVE” button and choose the “CREATE NEW KIOSK” option.
- Enter the “Kiosk Name” and “Unit Name” (see Setting Up the KioWare for Android Config Tool above) and select the “ADD NEW KIOSK” button.
- The new kiosk will show as “ANDROID DEVICE: [Unit Name]” in the listing.
- Scroll down and select the kiosk, or use the top “Search” (magnifying glass) button to find and select it.
- Select “Utilities” from the top toolbar. Then select the “Managed Configs” option.
- Scroll down to find the desired managed config file, and then select the pencil icon on the right.
- Select the “ADD ITEM” button. Scroll down and select your kiosk or group, or use the top search box to find and select it.
- Select the “CONFIRM” button. The kiosk or group will show in the Associated Items section on the prior screen.
- Select the “CLOSE” button, and the Affected Kiosks column will reflect the change for that kiosk.
Write a Review
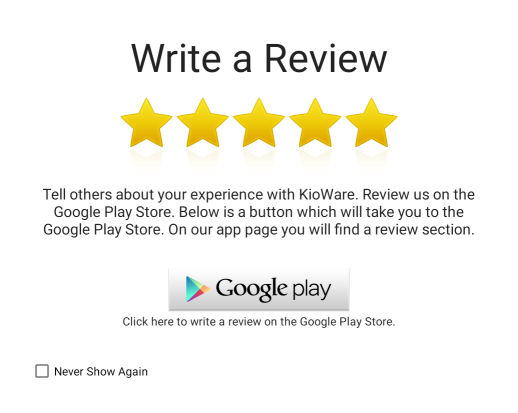
This tab appears after accessing the Configuration Tool four times. Click the “Google Play” button to open the Google Play Store, where you can rate and write a review on KioWare for Android software. We encourage all users of licensed and demo software to review our products, indicating their usefulness, any issues, and suggestions for future improvements. Reviews are examined by KioWare staff and will help us to continue providing the highest quality of products and services to our users.