Installation
System Requirements
One of the following is required:
- x86_64 CPU architecture
- Raspberry Pi 4, model B or 400
- Asus Tinker Board S
Installation Instructions
KioWare OS runs on four different platforms:
- Virtual machine (x86_64)
- Physical machine (x86_64)
- Raspberry Pi 4, model B or 400
- Asus Tinker Board S
Installation instructions for each platform appear in the sections below.
Virtual Machine (x86_64)
- Download and install VirtualBox: https://www.oracle.com/virtualization/technologies/vm/downloads/virtualbox-downloads.html.
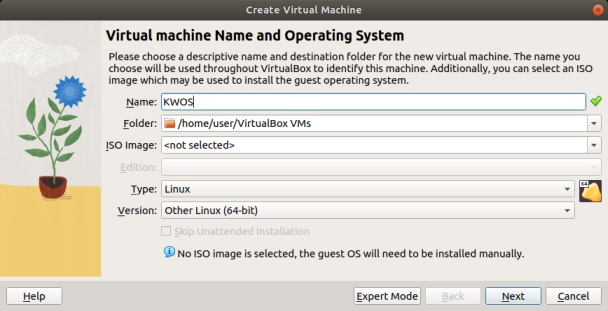
- Select the “New” button to create a new virtual machine. Below are the recommended settings:
- Set the type to “Linux” and the Version to “Other Linux (64-bit)” (see image below). Note: For now, do not select an ISO image; this will be done manually in a later step.
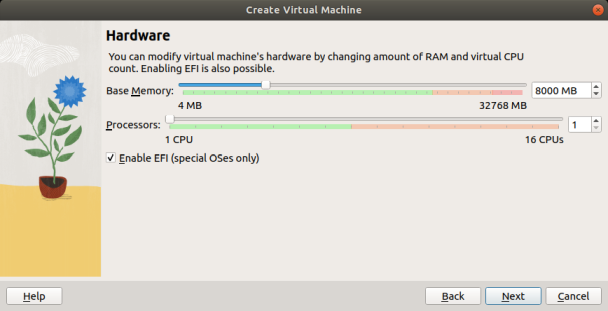
- Choose a memory size and number of processors based on the host machine's available resources (see image below). Also, check the box to enable EFI.
- Create a new virtual hard disk (see image below). (Note: 32 GB is recommended, but a minimum of 16 GB is required.) To save space, leave the “Pre-allocate Full Size” box unchecked.
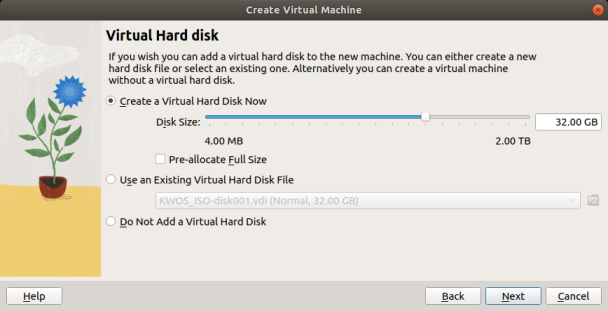
- Select the “Next” button (see image above), and on the screen that shows, select “Finish” to create the virtual machine.
- Download the KioWare OS iso file (kwos-amd64.iso, available on the KioWare website) and insert it into the virtual machine's empty optical drive via the steps below:
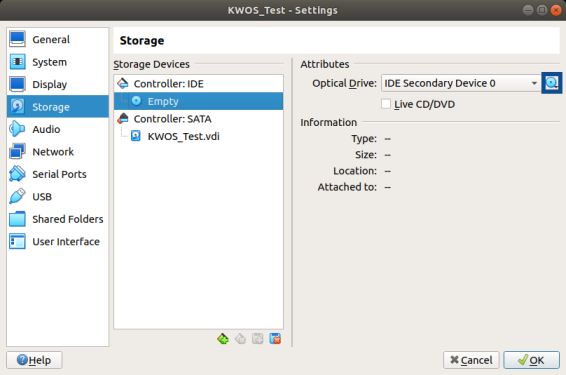
- When prompted, choose the virtual machine and select the “Settings” button to access the KioWare OS settings (see image below).
- In the Storage tab, select the “Empty” optical drive.
- Click the blue disk on the far right and select “Choose a disk file…”. Locate the kwos-amd64.iso file, and select “Ok” to confirm the changes.
- Start the virtual machine, and an installer will display. Below are the recommended options:
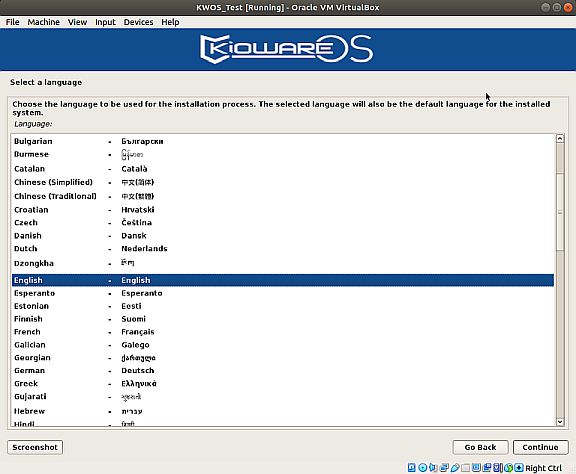
- Choose your language (see image below).
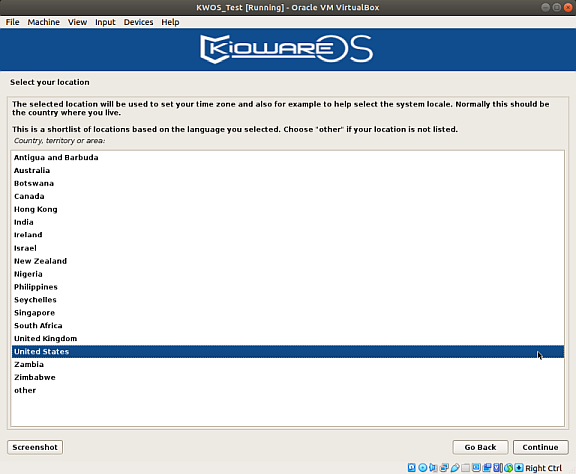
- Set your location to be used for the time zone and locale (see image below).
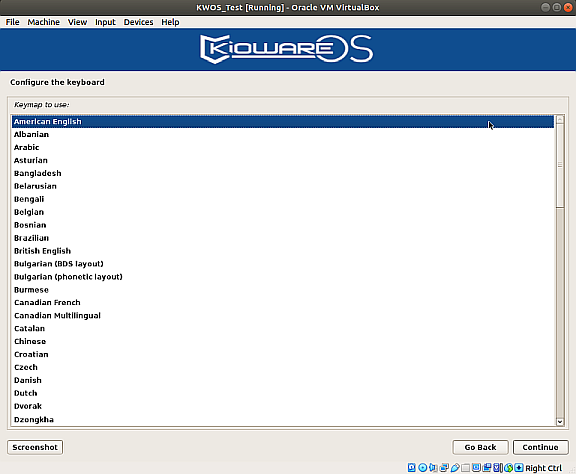
- Select your preferred keyboard configuration (see image below).
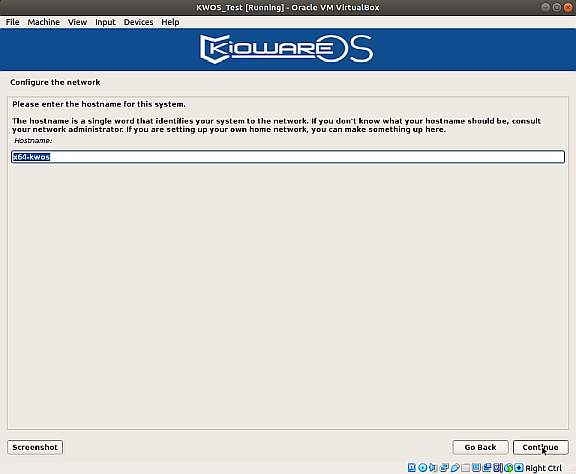
- Choose a hostname for your system (see image below).
- Select your time zone (see image below).
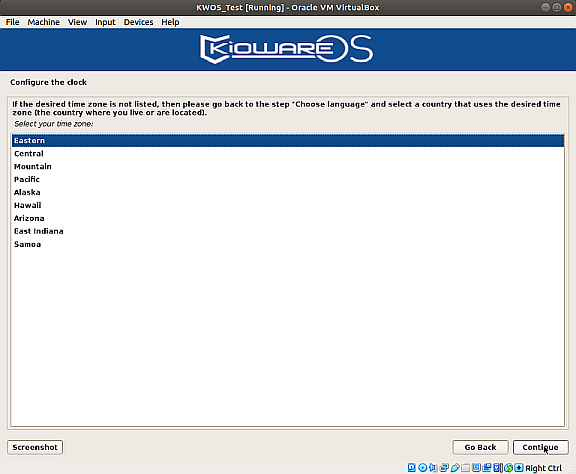
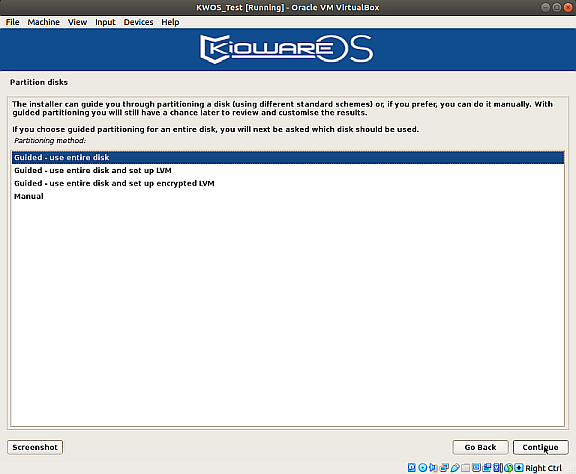
- Select “Guided - use entire disk” for the simplest configuration (see image below).
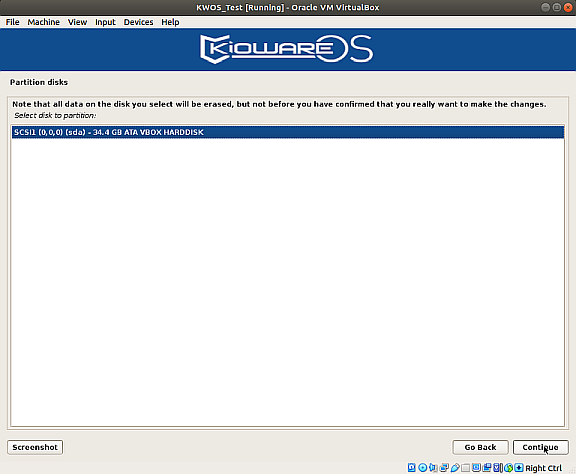
- Choose the virtual hard disk you created earlier (see image below).
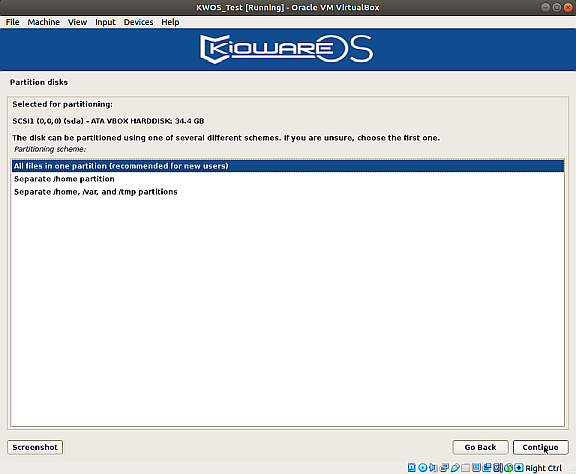
- Select “All files in one partition” (see image below).
- You will then see an overview of the changes to be made (see image below). Select the “Continue” button.
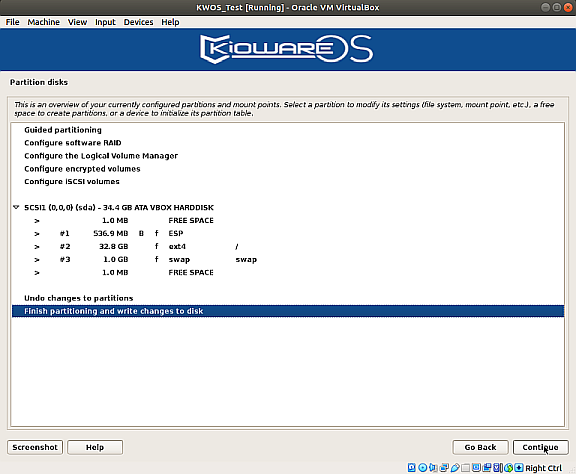
- Confirm the changes by selecting “Yes” (see image below).
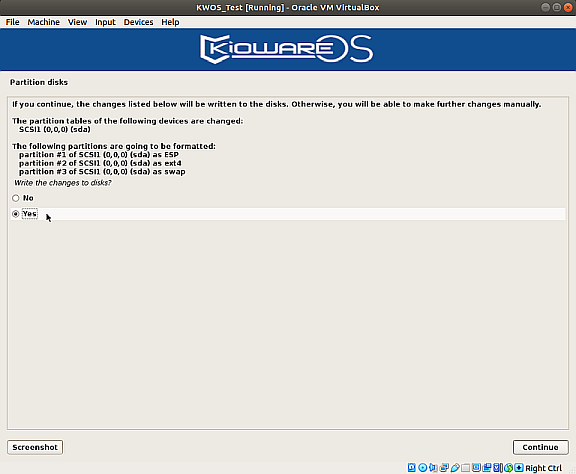
- KioWare OS uses the Debian distribution of the Linux operating system. Select a mirror country for the Debian archive (default is recommended; see image below).
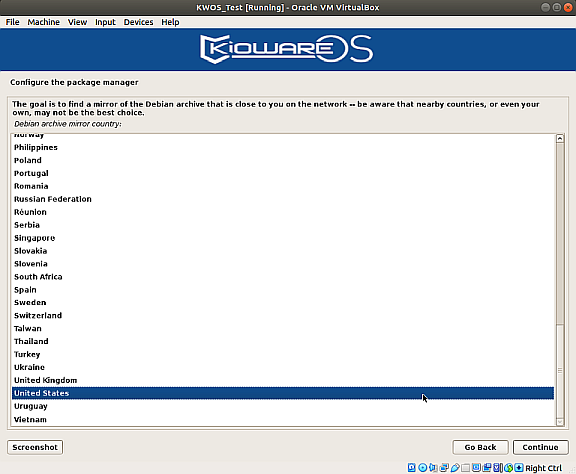
- For the Debian archive mirror, select “deb.debian.org” (see image below).
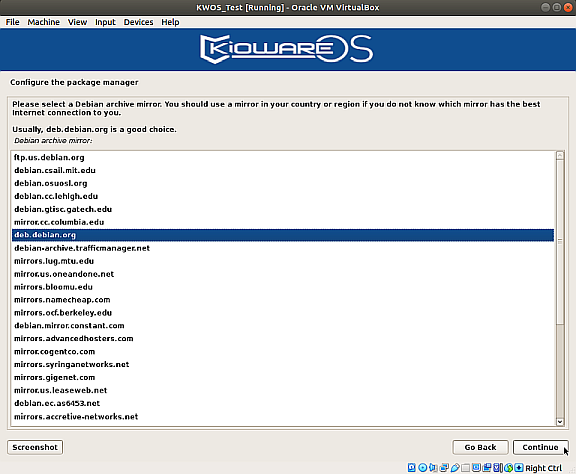
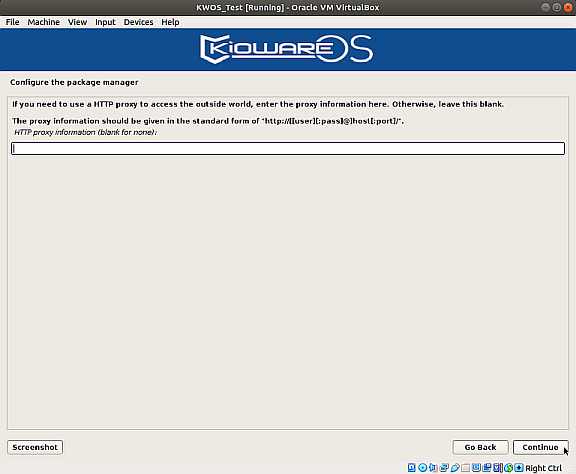
- If you are not using a proxy, leave the box blank and select the “Continue” button (see image below).
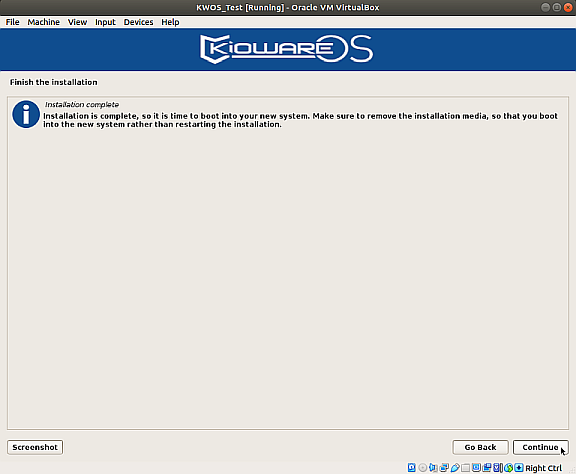
- Select the “Continue” button (see image below) to reboot into the newly installed system.
- Optional: To enable virtual machine features such as automatic window resizing and shared folders, you must install the VirtualBox Guest Additions:
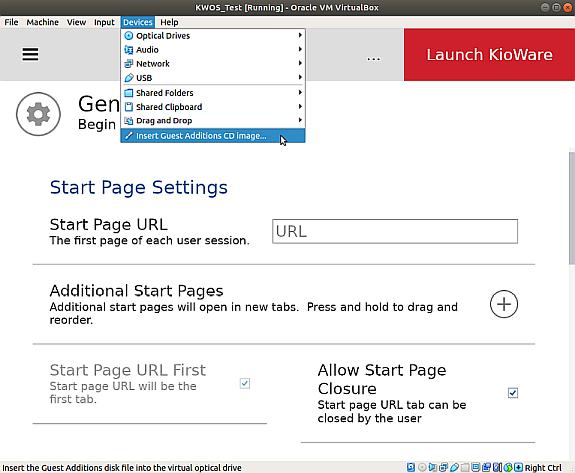
- When the KioWare Config Tool launches, you must agree to the terms and conditions. Then, under the “Devices” menu, select “Insert Guest Additions CD Image…” (see image below). Note: Selecting this option may appear as if nothing happens, which is normal.
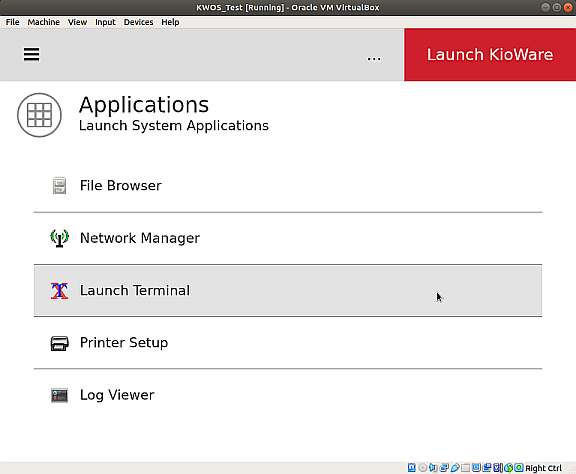
- On the Applications tab (accessed from the top left menu button, shown as three lines), launch a terminal (see image below). Run the following commands, pressing Enter after each. When prompted to enter a password, the default is kioware.
sudo mkdir /mnt/cdrom
sudo mount /dev/cdrom /mnt/cdrom
cd /mnt/cdrom
sudo sh ./VBoxLinuxAdditions.run --nox11
cd ~
sudo umount /mnt/cdrom
sudo usermod -a -G vboxsf kiosk
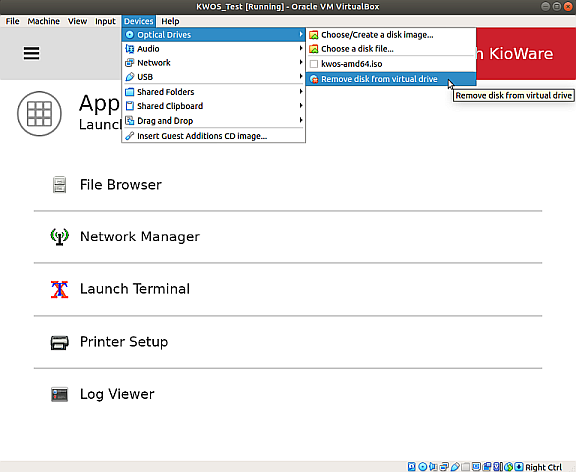
- Close the terminal, and under the “Devices” menu, “Optical Drives” option, remove the Guest Additions disk from the virtual drive (see image below). Note: If a popup window indicates the system is unable to eject the disk, select the “Force Unmount” button.
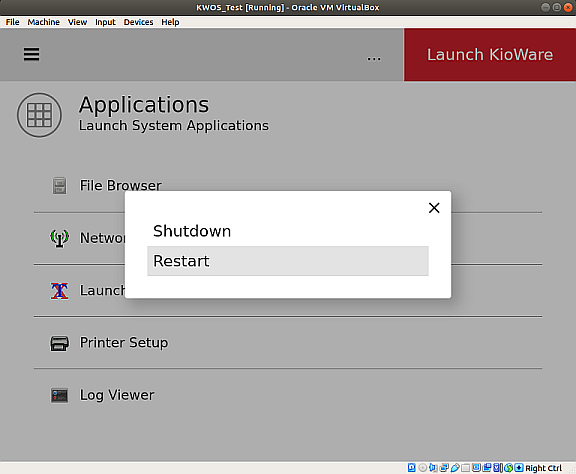
- Restart the virtual machine by clicking the ellipsis menu button (near top right) and selecting “Shutdown”, and then select “Restart” in the popup window that shows (see image below). After restarting, you can now maximize the window.
Physical Machine (x86_64)
- Download and install balenaEtcher: https://www.balena.io/etcher.
- Download the KioWare OS hybrid iso file (kwos-amd64.hybrid.iso, available on the KioWare website).
- Insert a USB flash drive. Note: The contents of the drive will be overwritten in the following step.
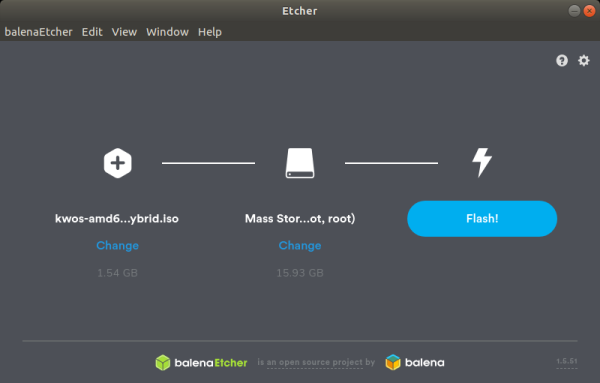
- Open balenaEtcher (see image below) and flash the USB drive via the steps below:
- Select the downloaded kwos-amd64.hybrid.iso file, and then choose the USB drive as the target.
- Select the “Flash!” button and wait for it to finish.
- Insert the USB drive into the computer on which KioWare OS will be installed. Be sure that the computer is powered off.
- To boot off the USB drive, power on the computer and bring up the boot menu. This is usually done by pressing and holding the F12 key during startup (less commonly used, the F2, F10, or Esc key can also show the boot menu).
- From the boot menu, select the USB device. When the boot finishes, an installer will display. For recommended options, see step 4 of Virtual Machine (x86_64) above (skip step 5 as this is only needed on virtual machines).
- After the installation finishes, reboot the computer and remove the USB drive to boot into the newly installed system.
Raspberry Pi 4B/400
- Download and install balenaEtcher: https://www.balena.io/etcher.
- Download the Raspberry Pi KioWare OS image file (rpi-kwos.img, available on the KioWare website).
- Using a USB adapter, insert a micro-SD card into your computer. Note: The minimum required size of the SD card is 16 GB, but at least 32 GB is recommended.
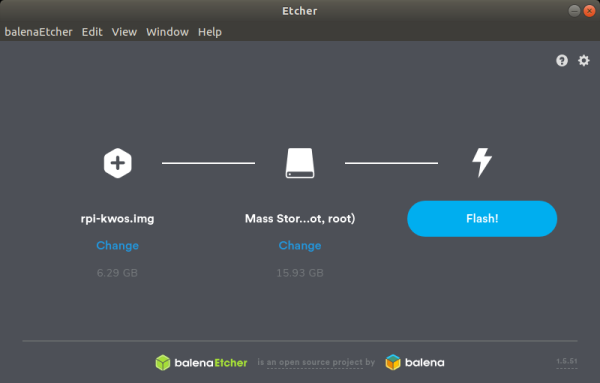
- Open balenaEtcher (see image below) and flash the SD card via the steps below:
- Select the downloaded rpi-kwos.img file, and then choose the SD card as the target.
- Select the “Flash!” button and wait for it to finish.
- After the flash is complete, insert the SD card into the slot on the bottom of the Raspberry Pi, and power on the device.
Asus Tinker Board S
There are two ways to install KioWare OS on the Asus Tinker Board S:
- Connect the device to a computer and install to its 16 GB of built-in, programmable flash memory.
- Insert an SD card into a computer, install to this card, and then insert it into the device for custom storage capacity.
Flash to the Built-in eMMC
- Download and install balenaEtcher: https://www.balena.io/etcher.
- Download the Tinker Board KioWare OS image file (tb-kwos.img, available on the KioWare website).
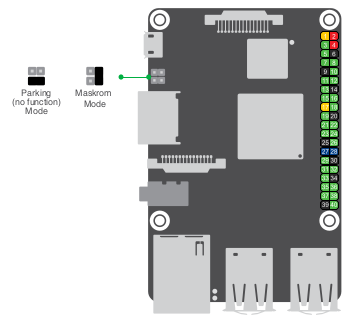
- Be sure the jumper is set to “Parking Mode” to use eMMC storage (see image below).
- Connect the Tinker Board to a computer using a micro-USB cable.
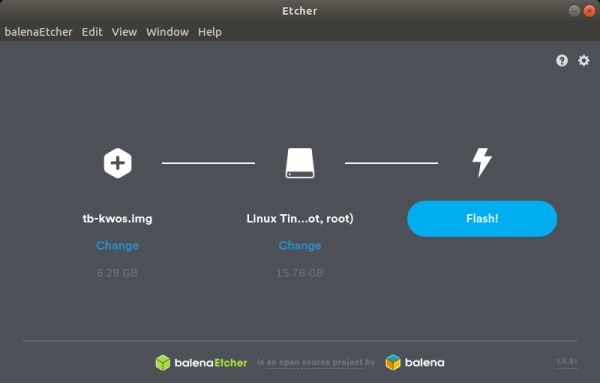
- Open balenaEtcher (see image below) and flash the Tinker Board via the steps below:
- Select the downloaded tb-kwos.img file, and then choose the Tinker Board as the target.
- Select the “Flash!” button and wait for it to finish.
- After the flash is complete, unplug the Tinker Board from the computer and connect it to its power cable to power it on.
Flash to an SD Card
- Download and install balenaEtcher: https://www.balena.io/etcher.
- Download the Tinker Board KioWare OS image file (tb-kwos.img, available on the KioWare website).
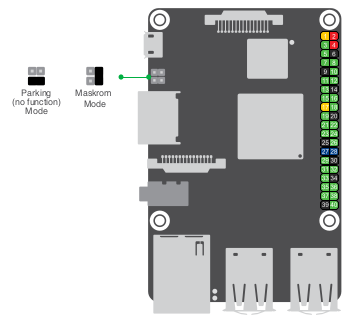
- Be sure the jumper is set to “Maskrom Mode” to use SD card storage (see image below).
- Using a USB adapter, insert a micro-SD card into your computer. Note: The minimum required size of the SD card is 16 GB, but at least 32 GB is recommended.
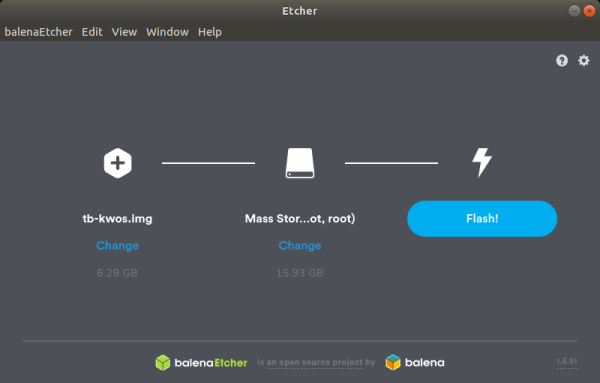
- Open balenaEtcher (see image below) and flash the SD card via the steps below:
- Select the downloaded tb-kwos.img file, and then choose the SD card as the target.
- Select the “Flash!” button and wait for it to finish.
- After the flash is complete, insert the SD card into the slot on the bottom of the Tinker Board, and power on the device.